Written by:
Editorial Team
Published:
October 18, 2026
Last Updated: October 18, 2026
Knowing how to pack kitchen boxes is the hardest part of any move. Plates chip, glasses crack, and that one good knife always vanishes. The difference between a smooth move and a box of shattered dishes comes down to preparation.
Start with a plan, not a roll of tape: one afternoon to sort, one to gather supplies, and one to pack.
Here's what you need:
Small boxes are your workhorse for the kitchen. Heavy items go in small boxes, light items in large ones.
The best way to pack dishes for moving is to wrap each piece, line the box, and stand plates on edge rather than flat. Wrapping protects the surface, lining absorbs shock, and vertical packing spreads weight so nothing cracks.
Here's the step-by-step:
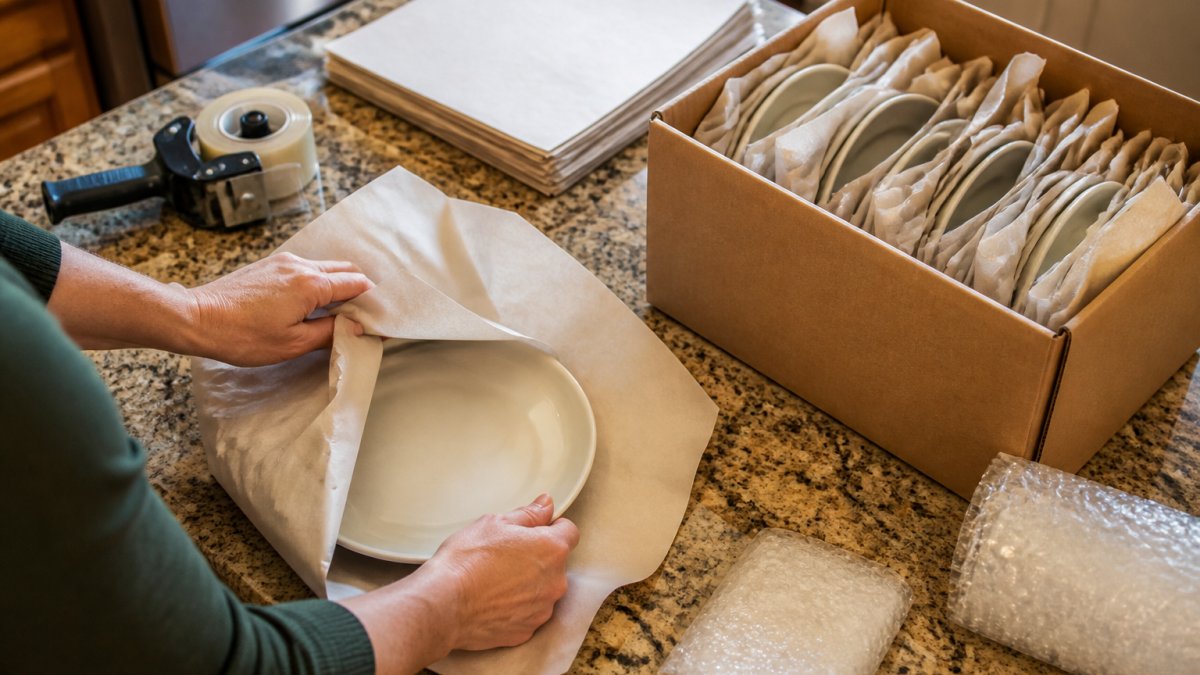
Stacked plates crack under their own weight. Stand plates on edge like records in a crate so each carries its own weight. Bowls get the same treatment, nest them with paper between each one, then wrap the whole stack in a small box.
Packing glasses for moving means stuffing each glass with paper, wrapping it, and standing it upright in a divided box. Glasses are the most fragile kitchen item, so they get the most care.
Follow this order:
Never lay glasses on their sides, the rim is the weakest point. Mugs and cups follow the same rules, with handles wrapped separately since they snap off easily.
Packing paper wins for everyday dishes; bubble wrap is better for heirlooms and extra-fragile pieces. Paper is cheaper, wraps tighter, and fills gaps well; bubble wrap adds an air cushion for delicate or irregular items.
Use this quick guide:
| Item | Best Wrap | Why |
|---|---|---|
| Everyday plates and bowls | Packing paper | Cheap, tight wrap, easy to fill gaps |
| Glasses and mugs | Packing paper | Fits inside and around curves |
| Fine china and heirlooms | Bubble wrap | Extra shock absorption |
| Odd-shaped serving pieces | Bubble wrap | Conforms to unusual shapes |
| Pots and pans | Packing paper | Prevents scratches, no need for air cushion |
A common mistake is wrapping everything in bubble wrap. It's bulky, costs more, and leaves gaps paper would fill. Save it for pieces you can't replace.
Cookware is heavy and awkward, so it needs its own approach. Nest pots and pans with paper between each one, then pack them in a small box.
Work through the kitchen like this:
Tape knife blades to cardboard before boxing, loose blades are a cut waiting to happen.
Matching items to the right box is the biggest factor in preventing breakage and protecting your back. Heavy items go in small boxes, light items in large ones, and no box should exceed a weight you can carry alone up a flight of stairs. Most movers cap small kitchen boxes at about 30 to 40 pounds and medium and large boxes at 20 to 25 pounds.
Use these common moving-box dimensions as your guide; they vary slightly by manufacturer.
| Box Type | Typical Dimensions | Best Kitchen Items | Target Weight Limit |
|---|---|---|---|
| Small | 16 x 12 x 12 in | Plates, glasses, mugs, pots and pans, canned goods, small appliances, knives | 30-40 lb |
| Medium | 18 x 18 x 16 in | Bowls, baking tins, utensils, dish towels, food processor attachments | 20-25 lb |
| Large | 18 x 18 x 24 in | Plastic kitchenware, dish racks, colanders, light bulky items, paper goods | 20-25 lb |
| Dish barrel / cell box | 18 x 18 x 28 in with dividers | Stemware, fine china, stacked plates with dividers | 25-30 lb |
| Wardrobe or tall box | 24 x 24 x 48 in | Brooms, mops, tall utensils, wrapping paper rolls | 15-20 lb |
When in doubt, size down. A small box packed to 35 pounds is safer than a large box packed to 50.
Confirm each box before you seal it:
Give yourself a realistic timeline and the kitchen won't feel overwhelming. Most kitchens take a full weekend of active packing, split across short sessions. Pack seldom-used items first and keep daily essentials accessible until the last possible day.
Work backward from moving day:
Pantry food is where most moves go wrong. Avoid moving what you cannot safely eat, and keep temperature-sensitive food out of a hot truck.
Do not pack open liquids, oils, or condiments in a box with dishes. A single leak ruins paper wrapping and turns a box of plates into a slippery hazard. Bag liquids separately and stand them upright.
Pack the kitchen in stages: seldom-used items first, daily essentials last, and a first-night box that travels with you. Sort pantry food into discard, donate, cooler, and box before moving day so nothing spoils or leaks in transit.
Packing a kitchen takes planning, the right supplies, and a little patience, but the payoff is fewer broken dishes and less stress. Jackson's Moving offers professional packing, so your kitchen arrives intact without you lifting a box. With our trained crew, transparent pricing, and no hidden charges, we handle the careful work so you don't have to. Get a quote today.
Pack plates and bowls vertically, standing on edge like records in a crate. Horizontal stacks put the full weight of every dish on the bottom one, and road vibration grinds them together. A vertical row spreads pressure across the edges instead. Line the box with cushioning, add a cardboard divider every few dishes, then fill gaps with crumpled paper so nothing shifts. This single change is one of the best ways to pack kitchen boxes without chipped rims.
Use packing paper for everyday plates, bowls, and mugs, and save bubble wrap for fragile or irregular pieces. Paper wraps tight, fills gaps, and costs less for the volume you need. Bubble wrap cushions better but is bulky and can leave marks on some finishes. A practical setup uses both: paper as your main wrap and bubble wrap as a box liner or for stemware and heirlooms. Never let bare dishes touch each other.
Start three to four weeks out with items you rarely use: holiday dishes, specialty bakeware, extra serving pieces, and pantry duplicates. Two weeks out, pack most cookware and small appliances. In the final week, keep only one pot, a few plates, and everyday glasses, then pack them the night before. Label every box by room and contents. A written kitchen packing checklist keeps this schedule on track and stops the last-minute scramble.
Nest pots and pans with a sheet of packing paper or a dish towel between each one, then place them in a sturdy medium box. Put the heaviest pan on the bottom and keep the box under 40 pounds. Fill empty space inside the pots with small, light items like measuring cups or spice jars, and stuff crumpled paper into any gaps. Stack lids on edge in a separate small box so they do not warp. Tape the bottom seam twice before loading.
Read genuine feedback from our satisfied customers to understand why we are the trusted choice for moving services.
From Phoenix to communities across the Valley, Jackson's Moving is here when you need residential, commercial, or long-distance moving services. Request your free quote today.